


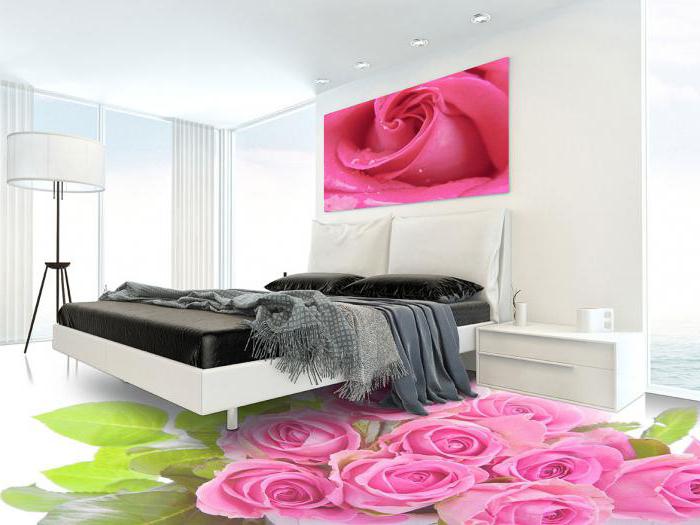
Transparent floor, which settles down bymodern filling technology, is a decorative coating. As its purpose is the protection of the polymer base layer in a design such as a three-dimensional surface.
Such complex coatings are today consideredelite, because they use them on expensive construction projects, here you can include large trade representations, art galleries, residential complexes, museums and hotels. You, too, can consider this option of finishing the floor for your apartment or house.

The transparent transparent floor is one of the most importantcomponents of a multicomponent coating that plays a protective role. Due to the fact that the material will protect the below-going decor, the quality of the original surface is quite high. The tin coating is laid on a concrete base, which should be ideal. This is achieved by grinding and shpatlevaniya.
It is possible to exclude the stage of grinding, however, in this casewill have to build a new screed. This technology is justified in the event that the coating is difficult to repair. The smooth surface is covered with a primer, drawing and other elements are applied to it according to the type of logos, geometric figures, banner films, as well as printed images. Sand and small items can be used. Ultimately, the transparent floor becomes part of the three-dimensional surface.

Preparation involves not only the repair andleveling, but also compulsory ventilation, because to complete solidification, polymers are toxic. For safety, a person should wear personal protective equipment. If the room is unheated, then before starting work it is necessary to raise the temperature above +10 ° С. Transparent floors have a two-component polymer mixture and various decorative elements. If we are talking about a polymeric two-component mixture, then here we should include the polymer itself and the hardener, which are mixed before laying.
The preparatory stage involves the devicewaterproofing, which increases the operational coverage period. Before starting the pouring, it is necessary to make sure that the concrete surface is free of oil stains and debris, otherwise it will not be possible to achieve good adhesion. It is important to apply two more primer layers.
To fill with polymers, you can proceed only afterAs all the previous layers dry, it takes about 4 hours. Before pouring it is important to prepare a polymer mixture, do it in separate portions, using a power tool for mixing. This will allow to form a base layer that dries up within a few days, if it is supposed to use pebbles or shells. If you want to apply a drawing, then the mixture should be allowed to dry completely, this will take about a week.
Once the decor can be placed, you canfill with a transparent polymer, the amount of which will depend on the desired thickness of the layer. Usually a transparent epoxy filler floor is poured into a layer of 3 mm, thus, to a section of 1 m2 It will take about 4 kg of the finished mixture. As a result, it is possible to apply a protective varnish that will improve the quality of the polymer surface.

If you want to fill a transparent floor, the materialit is necessary to choose competently. They can make "Elakor-ED", which is a completely transparent two-component epoxy light-resistant compound. It can be used in tandem with three-dimensional filling floors, where drawings, photographs and logos will be used. As a coating, a so-called stone carpet can be made, which is created from colored pebbles and colored sand.
Epoxy floors can be poured on sealeddecorative elements such as leaves, coins, shells and stones. Sometimes this composition is used even for decoration of walls, thus separate sites and inserts are formed. When pouring the floor is glossy, and to change the shine, additionally apply the varnish "Lux". In the end, you will be able to get a shine that will vary from glossy to deep matte.
As ingredients, the base is used andhardener, which must be mixed in a proportion of 2 to 1. The mixture flows well and aligns, forming a smooth coating. This transparent filling floor is chemically resistant, as a feature of the absence of odor when applied. The filling can be carried out on:

Before pouring the mixture must be prepared,component A does not need to be pre-mixed. As soon as you start mixing component A, component B is poured in at once, it takes about 3 minutes to mix. The mixer must be installed at a speed of 300 to 500 rpm.
The prepared composition is aged for 2minutes, until air bubbles come out. The composition should be poured on the surface and well distributed. You need to prepare so much mixture that you can work out in half an hour. Such transparent epoxy floors should not be scraped off the sides and bottom of the container. This requirement is due to the fact that mixing in these zones may be incomplete, which will inevitably cause the formation of surface defects.

Before you start applying, you need tomake sure that the surface is clean, dry and free from oil and grease. In order to exclude such contamination, the stacking of photos, as well as 3D films should be carried out in gloves and in replaceable shoes.
The air temperature, the surface of the material mustcorresponds to a limit of +5 to +20 ° C. At the same time, the relative humidity of air should not be more than 80%. It is important to make sure that the surface temperature does not drop below +3 ° C, that is, it is above the dew point. When transparent floors are arranged, photos of which you can see in the article, it is necessary to ensure the absence of drafts, and the temperature should not vary more than 3 ° С, such conditions must be adhered to not only in the process, but also after application. It is necessary to turn off the air conditioning systems, supply and exhaust ventilation and heated floors.

Transparent polymer floor should be applied withusing rakli with toothed canvases or mustaches. Use also a notched trowel. The layer is rolled with a needle roller to align and remove air bubbles. Such work can be done within half an hour after laying the layer. If you want a completely transparent floor, then its thickness should not be more than 2 mm.
After application within 3 days should be leftfloor without load, while the temperature should vary from +10 to +20 ° C. After 3 days the floor can be subjected to pedestrian loads, whereas in a week it is full.
During the aging process, the transparent filling floor should not be covered with plastic foil or cardboard. The surface should not get dirt, solutions, liquid paints and plasters.
On sale it is possible to meet also polyurethanefloors that are single-component and two-component. In the first case, it can be argued that such coatings have many advantages, among which:
One-component mixtures can be applied even whentemperature from -30 ° C, which is a huge advantage. This indicates the possibility of carrying out works all year round. The absence of the need for dosage during mixing simplifies and reduces the cost of the application process. If we are talking about two-component compositions, then their production should be carried out within 0.5-1 hours. If the master does not have time to work out the material, it will begin to thicken and become unusable.

